How To Install Pyle Speakers?
If you’re reading this, chances are you’ve recently purchased a pair of Pyle speakers and can’t wait to get your new sound system up and running. That’s great news! With Pyle speakers, you’re in for a treat when it comes to clear, resonant sound quality. We’re here to guide you through the installation process to ensure you can enjoy your new audio experience effortlessly.
But before we begin, it’s important to know that the installation process can vary slightly depending on the model of Pyle speakers you own. Don’t worry if this seems daunting; we’ll cover the basics that apply to most models and then dive into specifics further on.
“The beauty of Pyle speakers is their design simplicity, which makes installation fairly straightforward. Even those with minimal technical expertise should find the process manageable with careful attention and patience.”
Here’s a general list of steps you’ll need to follow to install your Pyle speakers:
- Unpack your new Pyle speakers carefully.
- Identify the installation spot that guarantees the optimum sound.
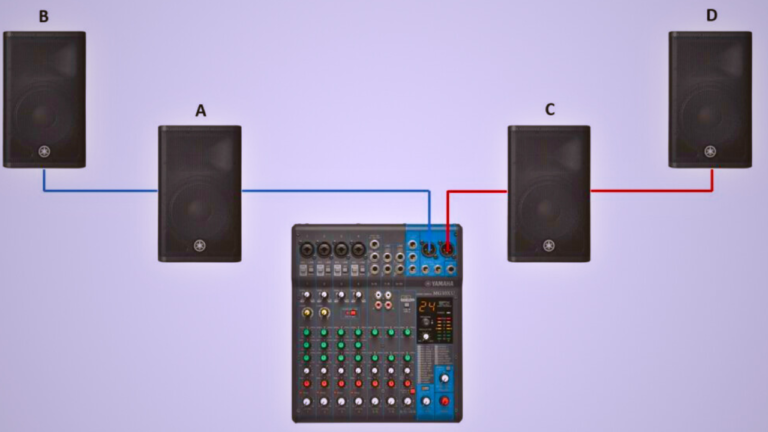
- Connect the speakers to your amplifier or receiver.
- Test the sound and adjust as necessary.
Remember, every Pyle speaker pair comes with an instructive manual specific to the model that outlines a detailed installation process. Make sure to consult it for any model-specific tips and precautions.
Read also: How Long Do Car Speakers Last?
What are the specific models of Pyle speakers this guide will cover?
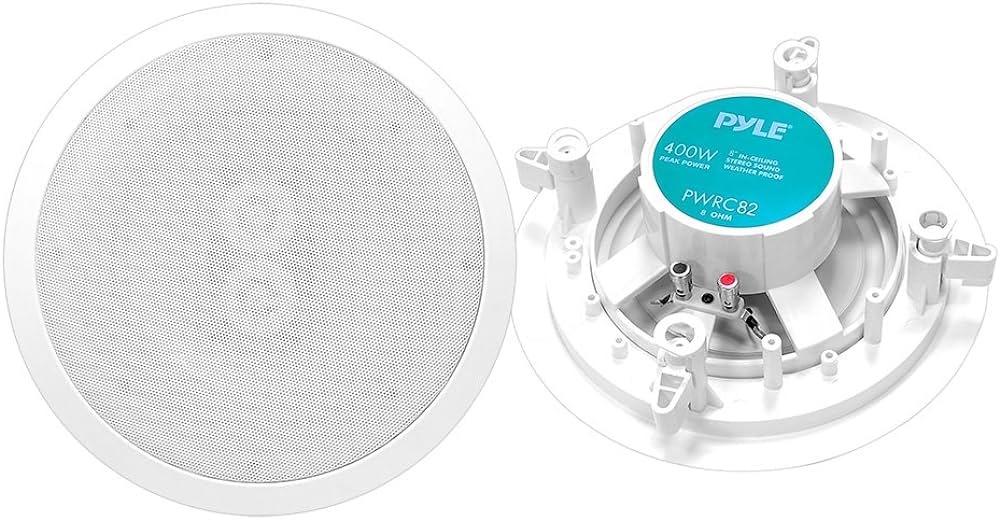
We’ll be exploring the installation procedure for a range of popular Pyle speaker models in this guide. Whether you’re installing a Pyle in-ceiling speaker set like the PIC series, the unique marine speakers from the PLMR series, or the versatile Pyle outdoor speakers from the PDWR series, we’ve got you covered.
| Speaker Model | Installation Area | Key Installation Steps |
|---|---|---|
| Pyle PDIC60 | In-wall / In-ceiling | Cut out drywall to fit speaker, connect wires, and secure speaker to wall/ceiling |
| Pyle PPHP1537UB | Stand-alone | Connect to power source, connect to audio source, and adjust settings as needed |
| Pyle PIC8E | In-wall / In-ceiling | Cut out drywall to fit speaker, connect wires, and secure speaker to wall/ceiling |
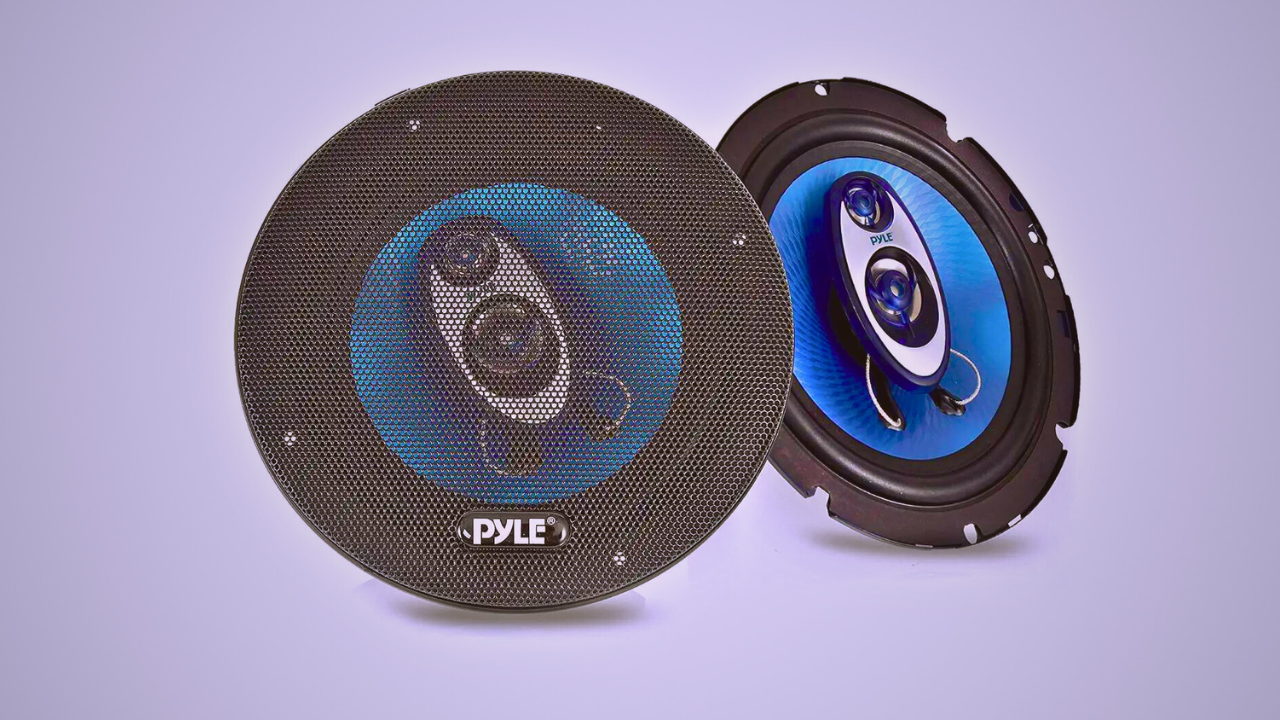
| Pyle PL63BL | Car doors and Rear deck | Remove door or rear deck panel, connect wires, and secure speaker to door/deck |
As Pyle offers a wide array of speakers suitable for different environments and needs, the steps for installation may vary for each model. But don’t worry! We’ll be walking you through the specifics of each of those mentioned here, ensuring that you can set up your Pyle speakers with confidence and ease.
What tools are necessary for the installation of Pyle speakers?
There’s no need to worry if you’re not an audio technician because installing Pyle speakers doesn’t require an arsenal of specialty tools. Here’s a handy rundown of the common items you’ll need for the job:
- Speaker Wire: For connecting your Pyle speakers to your audio system. Make sure it’s the correct gauge for your particular speakers.
- Wire strippers or scissors: to strip the insulation off your speaker wires, ensuring a solid connection.
- Phillips-Head Screwdriver: This will help you secure your Pyle speakers in their positions. Remember, not overtightening is just as crucial as not leaving them loose.
- Drill: This might be necessary for tightening the screws if the speakers are fitted into rigid areas. However, use this with caution so as not to damage the surrounding surfaces.
- Cable Management Equipment: This is absolutely optional but highly recommended. Clean cable management can make the installation look hassle-free. Zip ties, cord clips, or conduits can be handy here.
A pro tip: a bit of patience can also be considered a vital tool. Don’t rush the process. Ensure you’re taking the time to perfectly fit and connect your Pyle speakers for the best audio experience.
What are the common mistakes to avoid during the installation process?
Installing Pyle speakers may seem like a straightforward task, but there are possible pitfalls that you need to be aware of. Avoiding these common mistakes can lead to a better sound experience and prolong the life of your speakers.
Incorrect Polarity
Connecting the wires to the wrong terminal is a common mistake. This can result in poor sound quality and even damage your speakers. The positive wire should always be connected to the positive terminal and the negative wire to the negative terminal.
Over tightening
While it’s important to secure the speakers, overtightening the screws can damage the speakers and the mounting surface. Instead, tighten them just until they are secure and stop to prevent damage.
Lack of Insulation
Insulating the wires is an imperative step that’s often overlooked. Failure to do this might lead to electrical shorts, which can damage your speakers or your car’s electrical system. Use heat-shrink tubing or electrical tape to insulate bare wires and prevent electrical issues.
Ignoring Speaker Break-in Period
Like a new pair of shoes, a new speaker also has a break-in period. Not giving it time to break in can impact the sound quality drastically. It’s generally suggested to play music at medium volume for about 20–30 hours for the speakers to reach optimal performance.
Remember, the value of ensuring a correct installation process can’t be overstated. Avoid these common mistakes to guarantee a smooth install and stellar sound from your Pyle speakers.
What are the safety precautions to consider when installing Pyle speakers?
Firstly, always remember to turn off your vehicle’s ignition. This minimizes the risk of short-circuits and potential accidents during the installation process. You can do this by locating the fuse related to the audio system in your vehicle’s manual and temporarily removing it.
Next, handle your Pyle speakers carefully. These are fine acoustic instruments that can be damaged by rough handling, so don’t apply too much pressure while mounting. Also, avoid placing heavy objects on or against speakers.
Another important safety precaution is to carefully read and follow the instructions provided with your speakers. Failure to follow the instructions can not only damage your speakers but can also pose safety risks. Always check the diagrams and instructions before beginning.
Wear safety glasses when drilling or cutting into the vehicle’s body. This prevents small pieces of metal or plastic from entering your eyes.
Moreover, it’s a good idea to use gloves to protect your hands when you’re handling wires and other components. Many speaker installations involve dealing with small, sharp parts that can potentially lead to cuts or abrasions.
Last but not least, always have a fire extinguisher nearby during the installation. While this may seem excessive, it is always better to be overprepared than underprepared when installing electric equipment.
Following these precautions will not only ensure your safety but will also help in the smooth and successful installation of your Pyle speakers.
Read also: Why Are Focal Speakers So Expensive?
Are there any specific tips or hacks to make the installation process quicker and more efficient?
Positively! Every handyman knows a good hack or two can be the key to turning a task from a headache into a breeze. Here are some efficient tips tailored to ease your Pyle speakers’ installation process:
1. Pre-Installation Preparation
Before starting the installation, take your time to carefully read the speakers’ manual. It provides a detailed guide specific to your speaker model, ensuring your expedition to get your speakers up and running is right on track. If you’re installing a set of Pyle speakers, check the guide for the specific model.
2. Use Speaker Stands
Speaker stands prove handy in achieving an ideal listening height. By keeping the speakers at ear level, you enjoy a better stereo-imaging experience. Not only that, but they also help minimize vibrations, which could otherwise distort your sound quality.
3. Speaker Spacers
These little helpers can have a big impact. Speaker spacers ensure that your speakers fit perfectly within the required space. They’re not always necessary, but they’re always handy to have around when the speaker size and the opening don’t match perfectly.
4. Cable Management
Consider investing in quality cable management tools. Untidy cables can cause interference and degrade the speakers’ sound quality. Effective cable management also takes care of potential trip hazards, providing a clean, professional look.
5. Label Your Wires
Labeling your wires may appear unnecessary initially, but this small step can save you from a world of confusion down the line during connection. Use colors or symbols to indicate the source and destination of each wire. You’ll thank yourself later!
Remember, while these tips can make your installation process smoother, it’s always safety first. So, whenever in doubt, it is advisable to consult a professional installer. You’re now all set to enjoy a remarkable audio experience with your new Pyle speakers!
Conclusion
In conclusion, installing Pyle speakers doesn’t have to be a daunting task, even if you’re a beginner. With the right tools, careful planning, and a good understanding of the common pitfalls to avoid, you can easily install these speakers to boost your sound experience. Don’t forget to follow the safety precautions detailed above to ensure you’re protecting yourself and your equipment during this process.
Apart from the technical steps involved in the installation process, remember the role of patience and presence of mind. Do not rush the speaker break-in period, nor ignore the possibility of using speaker stands or spacers to enhance the sound quality. The tricks and tips shared in this guide, especially pre-installation preparation and careful cable management, work wonders in making the process faster, safer, and more efficient.
Remember, it’s all about creating the best sound environment for your needs. When done correctly, your Pyle speakers can deliver excellent sound quality and liven up your audio experience. Write to us and let us know how your speaker installation went. We’d love to hear your field insights and experiences. Until then, happy installing!
Read also: Can You Run 4 Ohm Speakers At 2 Ohms?
FAQs
What’s the first step in installing Pyle speakers?
The first step is to gather all your tools and make sure that you have the correct speaker model that fits your system. Afterwards, you should disconnect your sound system’s power to avoid any electrical damage.
How important is speaker polarity?
Speaker polarity is crucial. Incorrect polarity can cause sound distortion or cancellation. Make sure to connect positive to positive and negative to negative.
Can I install Pyle speakers on my own?
Yes, Pyle speakers are generally easy to install with the right tools and instructions. However, if you don’t feel comfortable tackling the job yourself, consider hiring a professional.
What’s the purpose of the speaker’s break-in period?
The speaker break-in period allows the components to loosen up and reach their peak performance level. Ignoring this could result in less effective sound reproduction.
Can I over-tighten the speakers?
Yes, over-tightening can cause the speakers to warp or the mounting surface to crack. This can affect the sound quality and also shorten the life span of the speakers.
What role does insulation play in speaker installation?
Proper insulation reduces unwanted vibrations and noise, enhancing the overall sound quality. It also provides an extra layer of protection for the speakers.
What happens if I incorrectly wire the speakers?
Incorrectly wiring the speakers can result in poor sound quality and may also cause electrical issues, which could potentially damage the speakers and other equipment.
What are speaker stands and spacers for?
Speaker stands assist in placing the speakers in an optimal position for a great sound experience. Spacers help mount speakers effectively in certain spaces without sacrificing sound quality.
How important is cable management?
Cable management can affect not only aesthetics but also the longevity of your wires. Proper cable management reduces the chances of wire damage and potential re-doing of installation.
What’s the professional fee for speaker installation?
The professional fee varies greatly depending on the complexity of the job, location, and the professional’s experience. It’s always best to get a few quotes before making a decision.

Hey there! I’m Henry Jack, the voice behind speakerrealm.com, your ultimate destination for everything speakers. Whether you’re a seasoned audio enthusiast or just starting to explore the world of sound, you’ve come to the right place.
At Speaker Realm, I dive deep into the realm of speakers, bringing you comprehensive reviews, insightful guides, and the latest trends in the industry. From floor-standing behemoths to compact bookshelf wonders, I cover it all.
I’m passionate about helping you find the perfect speakers to elevate your audio experience. Whether you’re setting up a home theater, upgrading your sound system, or just looking for some quality audio gear, I’ve got you covered.
But Speaker Realm isn’t just about technical specs and performance metrics—it’s also about the art and science of sound. I explore topics like acoustic design, speaker technology, and the impact of audio on our lives.
So whether you’re a casual listener or a hardcore audiophile, join me on this journey through the world of speakers. Let’s turn up the volume and explore the endless possibilities of sound together at speakerrealm.com!